Building an Efficient Annotation Pipeline: A Step-by-Step Guide
Creating an efficient annotation pipeline is crucial for any ML Project, especially when working with a rather problem and also when your target is to create large datasets. An effective pipeline streamlines the process making sure that the data is accurately labeled, there is consistency among the annotators and the data is ready for model training. This article will walk you through the steps to build a robust annotation pipeline, share best practices for managing large datasets, and provide tips for maintaining annotation consistency and quality.
1. Understanding the Basics of Data Annotation
Before diving into the pipeline, it’s essential to understand what data annotation is and why it’s important. Data annotation involves labeling data, whether it’s images, text, audio, or video, to make it understandable to machine learning algorithms. Properly annotated data is the backbone of supervised learning models, as it allows these models to learn patterns and make predictions.
You can read more this here
2. Setting Up the Annotation Pipeline
Step 1: Define the Annotation Objectives
The first step is to clearly define what needs to be annotated and why. Understanding the project’s goals will help you decide on the types of labels, the level of detail required, and the tools to use.
- Example Objective: If you’re working on a self-driving car project, your objective might be to annotate pedestrians, vehicles, and traffic signs in images.
Step 2: Choose the Right Annotation Tool
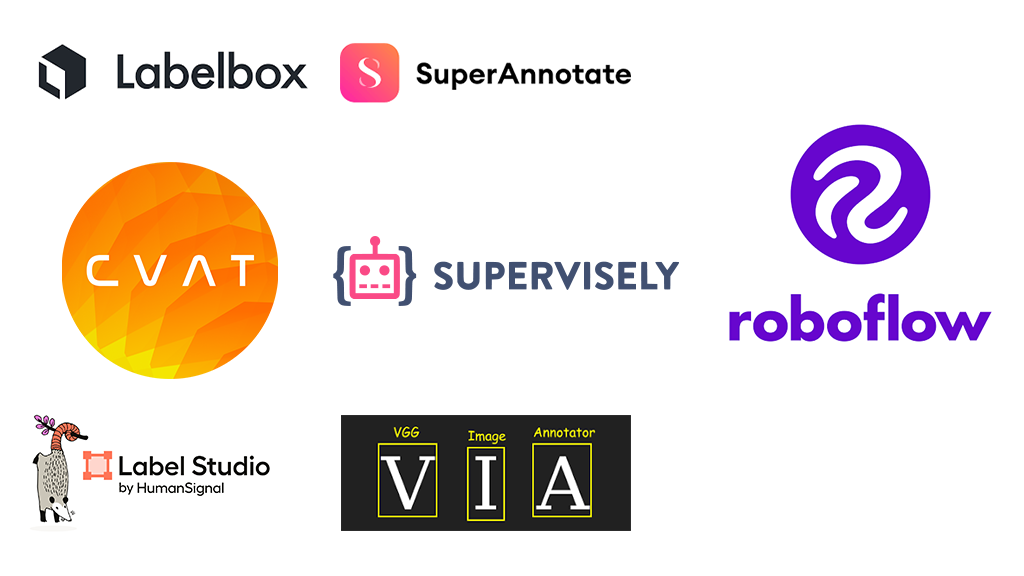
Choosing the right tool is crucial for an efficient pipeline. Some popular annotation tools include:
- Label Studio: A versatile tool for annotating text, audio, image, video, and time-series data. It supports both manual and automatic annotation workflows.
- CVAT (Computer Vision Annotation Tool): A web-based tool specifically designed for video and image annotation. It supports tasks like object detection, segmentation, and classification.
- VGG Image Annotator (VIA): A simple, lightweight annotation tool for image and video annotation. It is easy to use and doesn’t require any installations.
- Labelbox: A scalable data labeling platform with a wide range of tools for annotating images, videos, and text. It also offers machine learning-assisted labeling workflows.
- SuperAnnotate: A collaborative annotation platform that focuses on image, video, and LiDAR data. It provides tools for object detection, segmentation, and more, along with version control.
- Roboflow: A popular tool for managing and annotating image datasets, especially for computer vision projects. It allows easy export to various formats and model training integration.
- Supervise.ly: An all-in-one annotation tool supporting images, videos, and 3D point clouds. It has collaboration features and supports object detection, segmentation, and classification.
Note: Each tool has its own use case, and the best choice depends on your specific needs. For preparing datasets for computer vision projects, CVAT is very helpful. However, when working with textual or audio data, Label Studio is a better fit. Be sure to research which tool will be most suitable for your project.

Step 3: Prepare Your Raw Dataset
Before annotation begins, your dataset needs to be organized. This includes:
- Data Cleaning: Remove any irrelevant or low-quality data.
- Data Segmentation: Split your data into manageable chunks, especially if it’s large.
- File Naming Conventions: Use consistent file naming to avoid confusion later.
Important Tip: Consider using automated scripts to sort and rename files based on predefined criteria, such as date or content type.
Step 4: Create Annotation Guidelines
Annotation guidelines are critical for maintaining consistency across your dataset. These should include:
- Label Definitions: Clearly define each label and provide examples.
- Annotation Rules: Specify rules for overlapping objects, edge cases, and ambiguous scenarios.
- Quality Standards: Set thresholds for acceptable quality and outline the review process.
NOTE: Use Notion for this it is a very handy tools and can help you segregate each project try to annotate at least one label and write all the possible cases that might come for each label. Please keep interacting with the annotators and adding all the possible use cases you find.
Step 5: Train Your Annotators
Even with clear guidelines, human annotators need training. This involves:
- Tutorial Sessions: Walk through the annotation process using sample data.
- Practice Tasks: Allow annotators to practice on a small subset of data.
- Feedback Loop: Provide feedback on their work and address any questions or challenges.
Image Suggestion: A flowchart showing the training process, from tutorials to practice tasks to feedback.
Step 6: Annotate Your Data
With everything in place, annotation can begin. It’s essential to monitor progress and maintain open communication with your team to address any issues that arise.
Best Practice: Use a project management tool to track progress, assign tasks, and set deadlines. Tools like Monday.com can be integrated with your annotation pipeline for better oversight.
Step 7: Quality Control and Review
Quality control is vital to ensure that your annotations meet the required standards. Implement a review process where a percentage of the annotated data is double-checked by a senior annotator or project manager.
- Quality Checks: Make sure to incorporate quality checks and promote high-performing annotators to the role of Quality Control Specialists. They can help review the work of other annotators and ensure the entire dataset meets the required standards
- Human Review: Perform random checks on annotations to catch errors that automation might miss.
3. Best Practices for Managing Large Datasets
Use a Centralized Data Repository
When dealing with large datasets, it’s crucial to have a centralized repository where all data is stored and accessed. This can be a cloud-based solution like AWS S3, Google Cloud Storage, or a dedicated server.
- Version Control: Implement version control to track changes in your dataset and revert to previous versions if needed.
- Access Control: Limit access to sensitive data and ensure that only authorized personnel can modify the dataset.
Automate Data Preprocessing
Large datasets often require preprocessing, such as resizing images, converting formats, or extracting features. Automate these tasks to save time and reduce the risk of human error.
- Batch Processing: Use batch processing scripts to handle large volumes of data efficiently.
- Pipeline Integration: Integrate preprocessing steps into your annotation pipeline, so data is automatically prepared as it’s ingested.
Parallelize the Annotation Process
If your dataset is large, consider parallelizing the annotation process by dividing the dataset among multiple annotators or teams. This speeds up the process and reduces bottlenecks.
- Task Assignment: Assign tasks based on annotator expertise and workload to maximize efficiency.
- Regular Updates: Hold regular meetings or check-ins to ensure that all teams are on track and consistent.
4. Tips for Maintaining Annotation Consistency and Quality
Regularly Update Annotation Guidelines
As your project evolves, so might the requirements for annotation. Regularly update your guidelines to reflect any changes and communicate these updates to your annotators.
- Versioning Guidelines: Keep track of different versions of your guidelines to ensure everyone is using the most current version.
- Feedback Incorporation: Encourage annotators to provide feedback on the guidelines, which can be used to improve clarity and coverage.
Conduct Periodic Quality Audits
Regular audits help ensure that the quality of annotations remains high throughout the project. This can be done weekly, bi-weekly, or monthly, depending on the project’s scale.
- Audit Criteria: Define clear criteria for audits, such as accuracy, completeness, and adherence to guidelines.
- Corrective Actions: If issues are found, implement corrective actions immediately, such as retraining annotators or revising guidelines.
Leverage AI for Pre-Annotation
To speed up the annotation process and reduce human error, consider using AI tools for pre-annotation. These tools can automatically label data, which human annotators then review and refine.
- Model-Assisted Annotation: Use models trained on a subset of your data to pre-annotate similar data.
- Active Learning: Implement active learning to prioritize uncertain or complex cases for human review.
5. Outsourcing Annotation
In the evolving world of AI, the need for precise data annotation is more critical than ever. MachDen offers a range of annotation services to support various machine learning applications, from computer vision to natural language processing. By outsourcing annotation tasks, companies can benefit from expert teams that handle everything from image labeling to text classification, ensuring quality at scale. With a presence in both the USA and Pakistan, MachDen provides flexible, efficient solutions that meet the growing demand for accurate and reliable data annotation.
Conclusion
Building an efficient annotation pipeline is a meticulous process that requires careful planning, clear guidelines, and ongoing quality control. By following the steps outlined in this guide, you can create a robust pipeline that ensures high-quality annotations, even when dealing with large datasets. Remember, the key to success is consistency—both in how you annotate data and how you manage the process.
By implementing the best practices and tips provided here, you’ll be well on your way to creating datasets that power effective and accurate AI models.


1 Comment
izmir son dakika haberleri · July 12, 2025 at 12:07 pm
I appreciate you sharing this blog post. Thanks Again. Cool.